
I’ve been using my current avatar for over ten years. Ever since I started working in bioinformatics, I’ve wanted to add more complexity to it—half with circuit‑board patterns, the other half with DNA patterns, connected by a smooth transition in the middle to symbolize the transformation from biology to information, which fits my professional field. However, I’m not very skilled at photo editing, so I couldn’t achieve the desired effect. This year, the newly released image‑editing models gave me hope to realize my idea.
Actually, when image‑generation models first became popular and the internet was flooded with AI‑generated beauty images, I tried every open‑source and commercial model I could get my hands on, attempting to draw at least a picture that transitions from DNA to circuit‑board patterns. In the end, only the image provided by Gemini was decent enough, and it has since become the banner of my blog.
This year, I accidentally came across an introduction to Alibaba’s qwen‑image‑edit on WeChat and learned that there are models specifically designed for image editing, capable of combining different elements to create new images. This was perfect for my plan to update my avatar. So I found a simple front‑end on GitHub (I felt my needs didn’t require something as complex as ComfyUI), forked it myself, added model selection and multi‑image input, and started modifying my avatar.
Before officially starting the image modifications, I used my modified little tool to test the effects of qwen‑image‑edit and wan2.5‑i2i‑preview. The actual tests showed that Wanxiang (万象) performed better, so all subsequent work was done using Wanxiang.
The One-Step Method
The examples in the qwen‑image‑edit project demonstrate quite powerful editing capabilities—from replacing clothes and modifying text to blending graphics. Therefore, I expected that simply providing a description would allow me to complete the modifications in one go. But, as expected, marketing is one thing, actual usage is another; the “seller’s show” and the “buyer’s show” are always different.
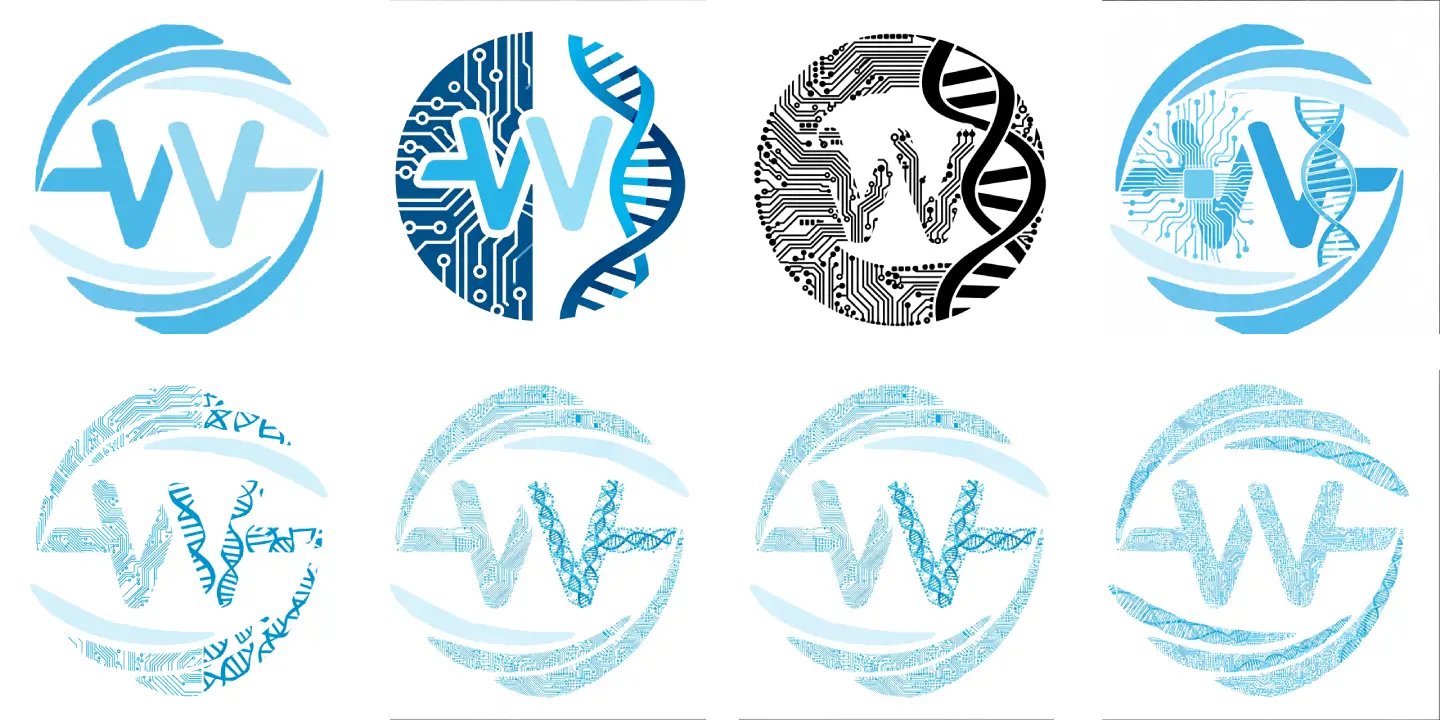
Below is a collection of my all‑in‑one attempt results. The leftmost image in the first row is my original avatar, and the other three are results I obtained by writing simple prompts. My prompt was roughly a simple description like this:
Figure 1 is a logo. I now want to turn the shape of this logo into a shape composed of specific patterns. The left half of the graphic should have circuit‑board patterns, and the right half should have DNA double‑helix patterns.
After several attempts, the results were far from what I expected, so I turned to ChatGPT to optimize the prompt. The resulting prompt looked roughly like this:
While strictly keeping the overall outline, proportions, and structure of the original icon completely unchanged, reconstruct the icon’s texture.
The icon consists of stylized letters S and W, where the S is formed by upper and lower feather‑like arcs, and the W is located in the center, presenting a ring‑like dynamic structure.
Modification requirements:
The left half of the icon (including the corresponding S and W area outlines) should be filled with fine circuit‑board patterns:
Include PCB traces, chip pads, and micro‑electronic lines.
Lines should be clear, with a strong technological feel and engineering precision.
The right half of the icon (including the corresponding S and W area outlines) should be filled with DNA double‑helix structure patterns:
Show regular double‑helix twists.
Include base‑pair ladder structures, conveying a bio‑tech and life‑science texture.
Overall style requirements:
All textures serve only as fill patterns and must not alter the original outer contour.
The two textures on the left and right should transition naturally along the central axis without mixing.
Maintain the icon’s simplicity and recognizability, suitable for a tech / bioinformatics / AI‑related brand logo.
Keep the background solid or transparent.
High contrast, vector‑like, clean, professional.
Output a clear, modern icon effect that can be used in a brand visual system.
With this more professional prompt, I could obtain images in the second row that came much closer to the effect I wanted. However, two issues arose during the process:
- The original graphic has two arcs that are lighter in color, and the model mostly seemed to ignore modifying those parts.
- The model couldn’t clearly distinguish the upper and lower parts I described—after all, these two parts aren’t strictly vertical or strictly horizontal…
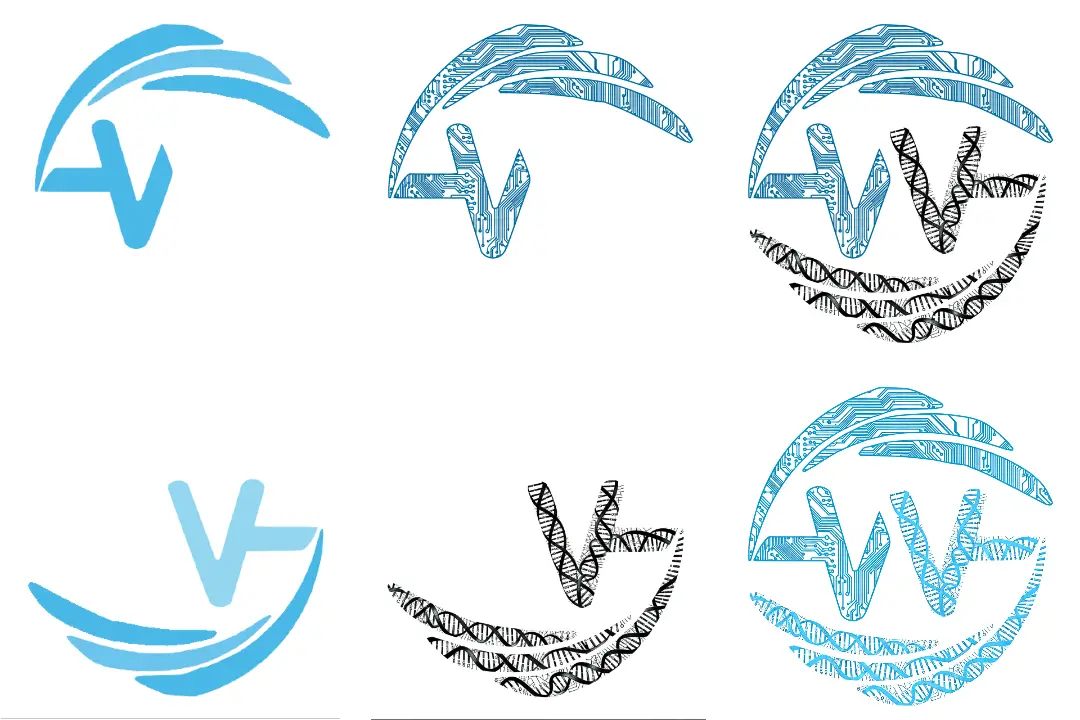
Step‑by‑Step Method
After failing to accomplish the task in one go, I eventually chose to complete it step by step (well, no wonder professional workflows need ComfyUI). First, I manually changed the colors of the original image to avoid the model skipping those areas. Then I separated the two parts that needed different textures myself, to prevent the model from misidentifying the two parts I mentioned, which would lead to inaccurate texture modifications.
Finally, after obtaining the two parts separately, I combined them. During this process, another issue appeared: when drawing the DNA pattern on the lower part, the model couldn’t color it correctly, so I had to add a final coloring step.
Summary
Although the process wasn’t very smooth and the final result isn’t 100% what I envisioned, it’s about 85% there. Moreover, the whole process was much faster than I expected—excluding the time spent modifying the tool, the graphical part actually took only about two hours. I’ve watched Naing, who creates artwork for Vtubers, work live; crafting a small pattern isn’t that simple… especially for something as intricate as the circuit‑board and DNA patterns I wanted. Given that, I’m quite satisfied with what the model could achieve.