Picking up from where we left off, after successfully compiling the code in the libapp project, the next steps are: modifying the libapp code and applying the changes to the image.
How the Terminal App Works
I’ve successfully seen the terminal app in the browser. To modify the code, I first need to understand how this application works.
After some experimentation, my understanding of the terminal application is as follows:
- The terminal app consists of several pages. The outermost interface is actually the
terminal.htmlpage, which calls and loads a series of JS scripts within the project to render the page content - When establishing an SSH connection, the application actually calls special chrome native APIs (similar to Electron?) available only in ChromeOS, opens a new window, and displays the
terminal_ssh.htmlpage. This page calls JS scripts in the nassh directory to perform the actual terminal rendering - Starting an SSH connection actually passes SSH parameters to the
terminal_ssh.htmlpage, where scripts within the page construct the SSH command and hand it off to downstream APIs to establish the SSH connection - Settings are also on a separate page, corresponding to
terminal_settings.html
Modifying the libapp Code
After understanding how the application works, the next step is to try modifying the code. Although I haven’t specifically studied HTML/JS/CSS web technology stacks and can roughly understand the code logic, I don’t plan to design and write code from scratch. I mainly refer to existing code and combine it to implement the functionality I need.
From my own usage experience, the existing SFTP mount to local functionality is somewhat similar to the quick port forwarding feature I want:
- SFTP mounting requires setting up SSH details like port, user information, etc.
- Based on existing login entries, SFTP mounting is performed. Clicking mount opens a new page similar to SSH login, but it’s not interactive—it only displays mount information, and the mount automatically ends when the window is closed
The functionality I want follows this logic:
- Port forwarding requires setting up SSH details like port, user information, etc.
- Based on existing login entries, port forwarding is performed. Clicking forward opens a window to set which port to forward
- Similar to SSH login, a new page opens but is not interactive—it only displays the forwarded port, and forwarding automatically ends when the window is closed
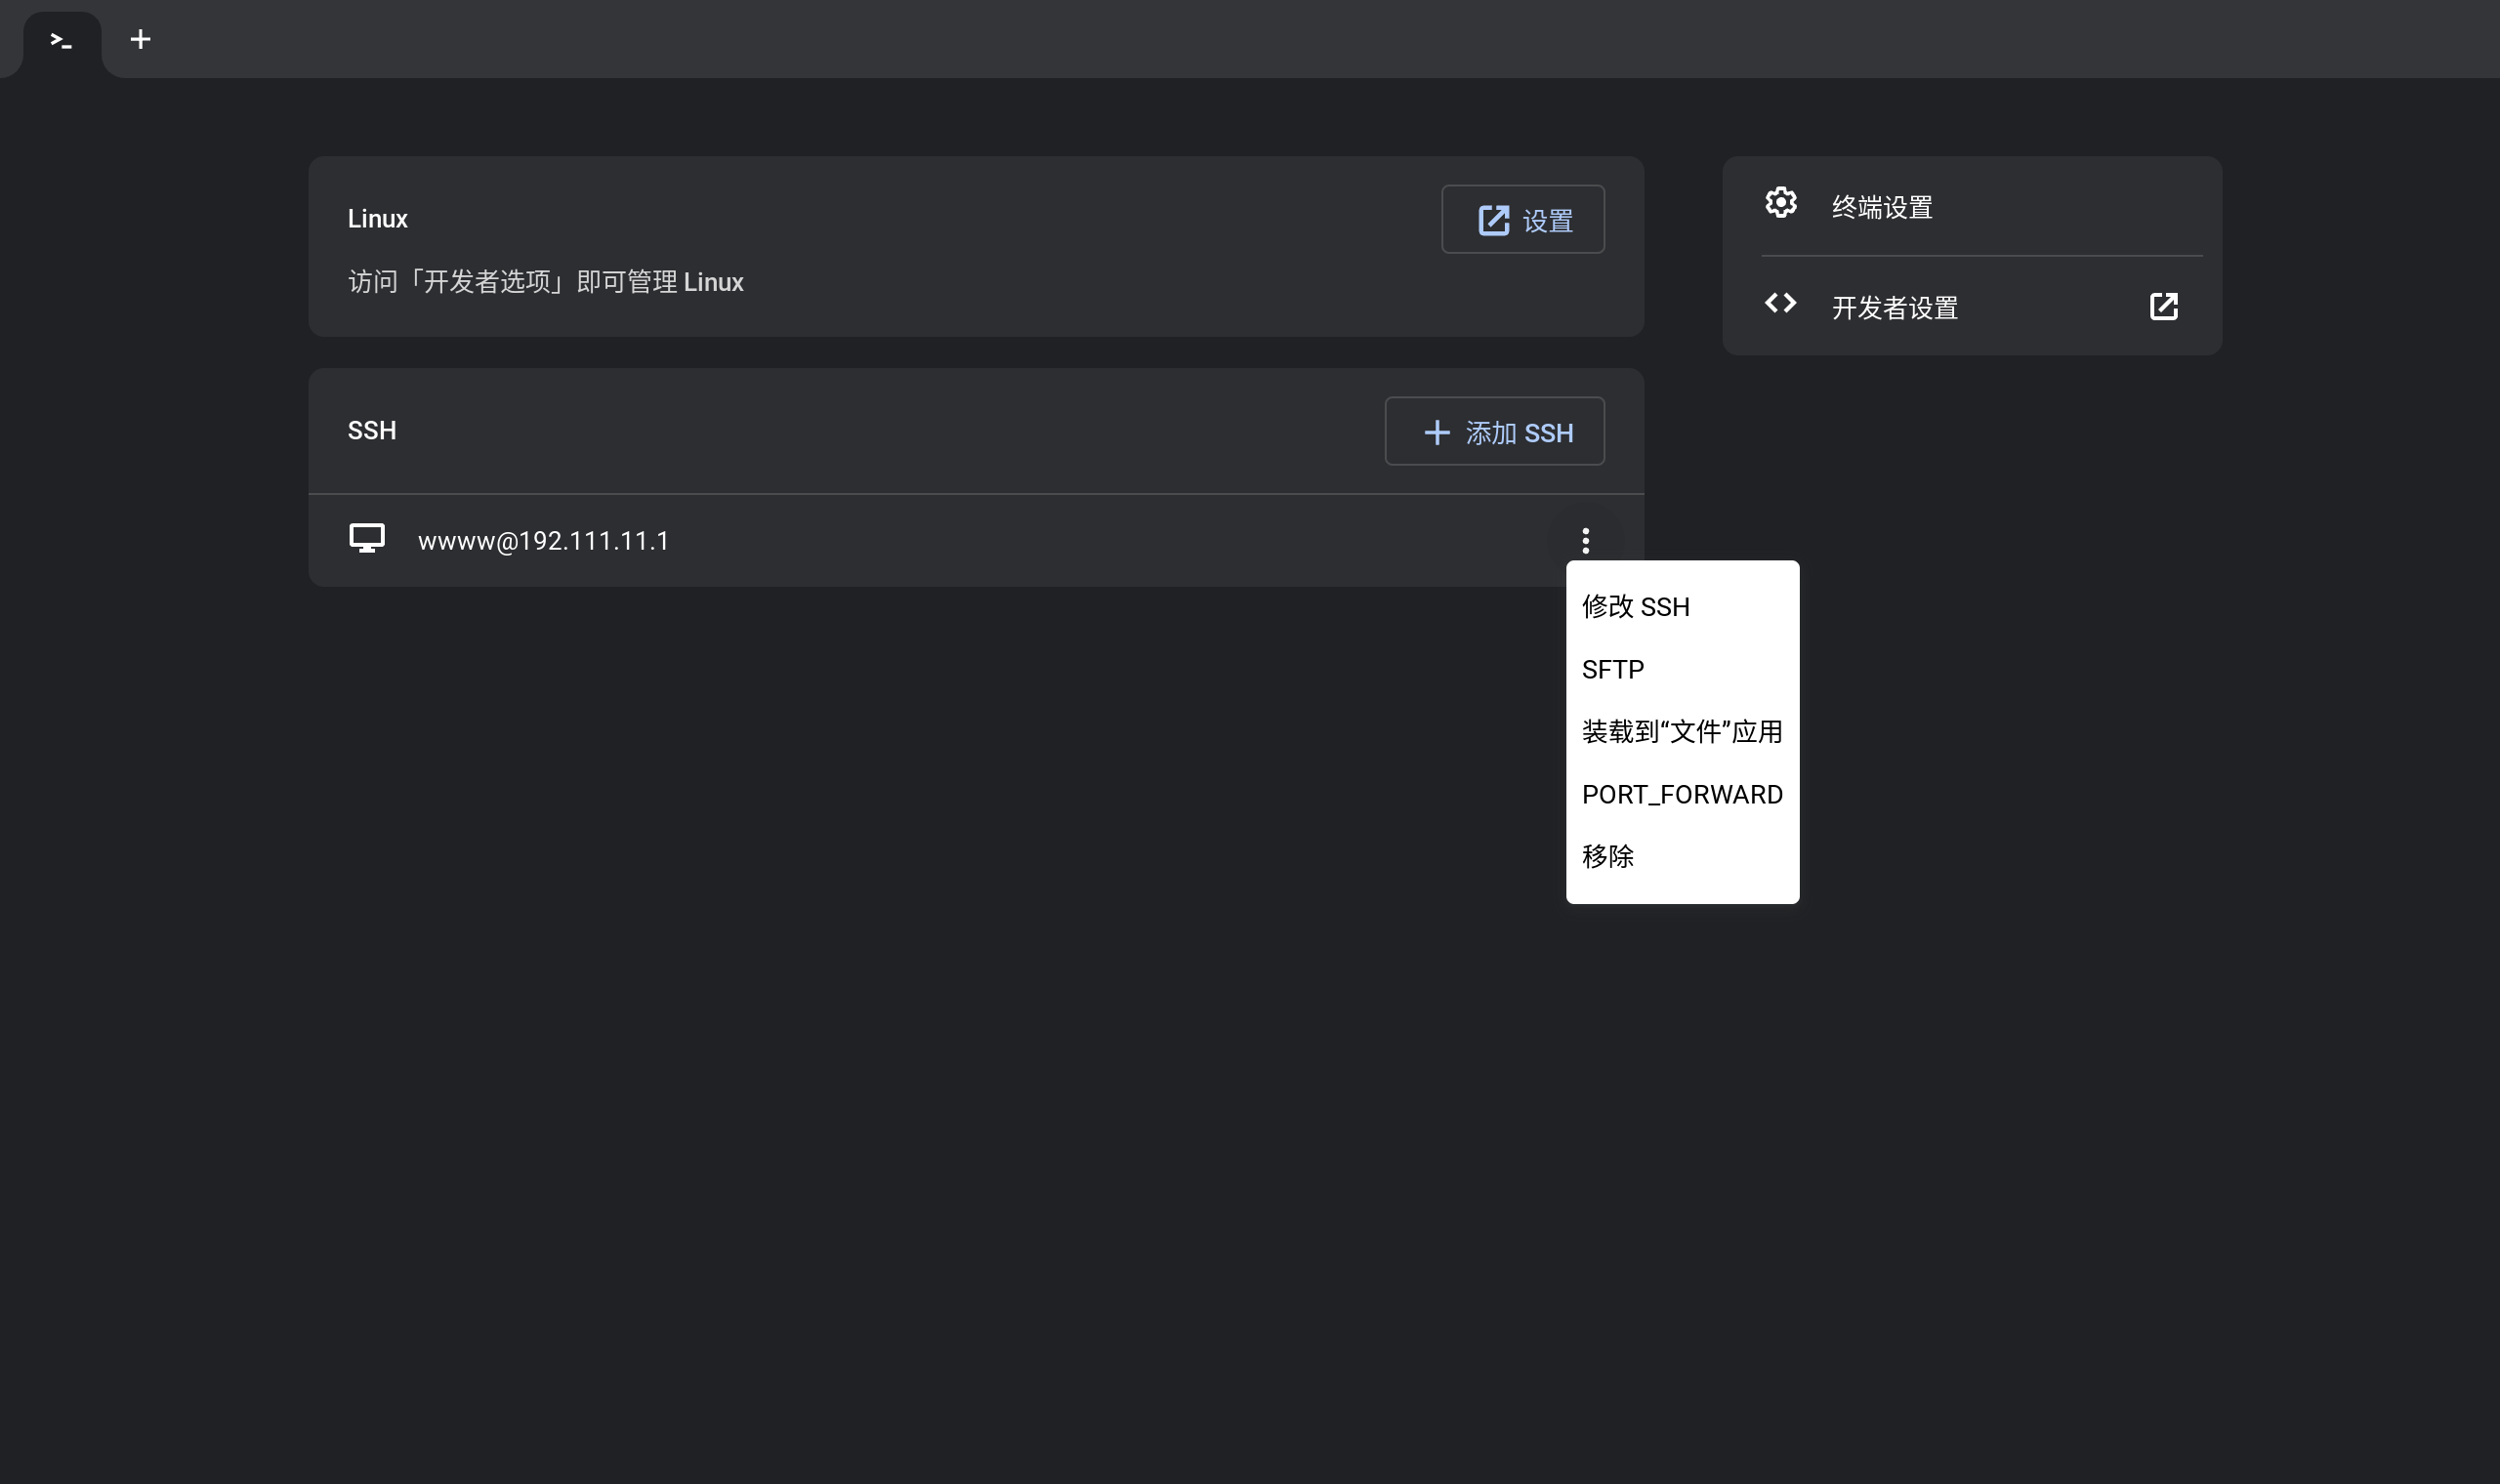
The actual modified files are mainly JavaScript files in the terminal and nassh directories, primarily adding a forward button, and then referencing the SFTP functionality implementation to create a function that can perform port forwarding
Applying Modifications to the Image
In the ChromeOS source code, libapp is not the package name. After searching the project, I found that the compilation of these contents is actually in crosh-extention.ebuild. I found the directory for this ebuild, used git to generate a patch, and placed it in this directory
1 | git diff COMMIT_HASH_1 COMMIT_HASH_2 > patchfile.patch |
I also needed to further modify the ebuild file by adding the following content. During the build, the patch will be automatically applied to modify the code
1 | PATCHES=( |
Recompiling Packages and Images
Here I encountered a pitfall: if you only modify files and compile directly using the previous method, the changes won’t actually be applied.
According to this content I found, you need to use the cros_workon command in cros_sdk to mark specific packages for modification. This ensures that the compilation uses my modified ebuild file instead of fetching source code from a specific version.
The compilation process can [refer to previous steps]. When executing build-packages, the tool automatically identifies changed packages, rebuilds them, and places the updated packages into the chroot environment.
Flashing and Booting
[Flashing hasn't changed much either]. However, after randomly modifying the kernel last time, my test device (the Duo) was bricked. So I referred to the [Fydetab Duo wiki instructions](https://wiki.fydetabduo.com/unbrick_the_fydetab_duo) to enter maskrom mode for flashing.Debugging?
This actually leaves a question: no matter what development you do, you should theoretically complete testing in a test or virtual environment before conducting real device testing and debugging. Otherwise, you’ll waste a lot of time compiling and flashing back and forth. I think this is also the significance of various SDK and Studio suites.
However, I currently don’t know… How should I debug such modifications before flashing? According to a blog I found, it seems possible to use the virtual machine functionality of cros_sdk, calling QEMU’s KVM virtual machine, which seems to allow debugging of compiled images.
Next time, I’ll debug the functionality properly and show the results! For now, here’s a preview of the interface changes after flashing!


